Tuesday, September 18, 2012

Birthday Cards for 6-8th Graders

Happy Birthday to 30+ 6-8th graders in my CA Virtual Academy class.  I had to make a birthday card for each one...and I decided to use the same chocolate cupcake (Simply Charmed) for each one and change up the background of the actual card...some are more boy colors and some are more girlie colors.  I had a lot of fun with my assembly line and I hope they all love them.

Side note; I'm working again...after being an unemployed teacher for 2+ years...and it is so wonderful!  Plus, my job is based out of my home.  I am a virtual teacher and therefore all of my correspondence with my class is mainly through email and phone calls.  It's the wave of the future...My classroom is online and my students learn at their own pace.  :-)  I'm loving life!!

Happy Wednesday!!

Saturday, August 25, 2012

Christmas in August

I was working on some Christmas gifts the other night...
cute and personal note-cards.  I hope the friends 
I am giving them to appreciate them ;-) 

Sweet 16!!

RECIPE:
Birthday Candle border punch
Everyday Paperdolls Cricut cartridge
"Time To Celebrate" stamp
Cuttlebug folder "Divine Swirls"
Miscellanous gem
Black stickles
Blue, beige, yellow, green and pink scraps of paper
Inky Antics Honeycomb paperpad in rainbow

xoxo <3  I love how easy the Honeycomb paper pad
was to work with...I cut the pad into a circle to make the
border, but it is also a lot of fun to use to make Pop-Up cards.  :-)

Monday, August 6, 2012

Pop-Up Card using Honeycomb paperpad by Inky Antics

"I wish I'd have thought of that"  ;-)
Think about party decorations...the table centerpieces that would stand up on their own with the honeycomb paper that you had to unfold.  The people at Inky Antics took this honeycomb paper and took it a step further.  They have a whole line called Honeycomb Pop that uses this paper and stamps to make Pop-Up cards.  This is one I made, not using their stamp set...I am going to HAVE to purchase a stamp set though because they are so darn cute!!  
RECIPE:
Cuttlebug folders;
"Divine Swirls"
"Tiny Bubbles"
"Polka Dots"
"Seeing Spots"
Free hand cut outs of balloons
Honeycomb paperpad in Rainbow by Inky Antics
"Happy Birthday" stamp
Smile saying stamp
Yellow/pink/orange/blue scraps of paper
Peach colored string
5x7 size card

xoxo <3  I really loved making the Pop-Up balloon...I can't wait to use more 
of the Honeycomb Pop line by Inky Antics in the future!!  :-)

Sunday, August 5, 2012

My evening project

I'm starting a new job tomorrow and I'm working from home.  So, I'm getting my office ready to go.  One thing I need is a whiteboard.  I live for lists and notes...so, of course I need a super big whiteboard.  I used a large poster frame and scrapbook paper to make mine.

RECIPE:
6 pages of patterned scrapbook paper
6 pages of white scrapbook paper
Adhesive
Paper cutter
1 Large poster frame 36x24

WHAT I DID:
First I positioned 6 sheets of patterned scrapbook paper to fill in the poster frame. Then I used 4 of the white pages (12x12) and placed them in the corners of the frame with about a 1 1/2 inch border.  Next, I cut 2 of the white pages to be 9x10 1/2.  These pages will go in the middle of the 4 white pieces of paper.  As I found the right spot for each page I adhered it together with my ATG gun.  Lastly I put the whole thing into the frame and positioned the backing in place...Whiteboard complete!  :-)  I can't wait to get a new dry erase marker to try it out!!

Graduation Card

RECIPE:
Silver cardstock(off the rack @Stamper's Corner)
Silver/beige patterened paper(off the rack @Joanns)
Red/sparkly/striped paper(DCWV Immortal Love stack)
Black and yellow and white scraps
Black ribbon
"Just For You" stamp
Everyday Paperdolls Cricut cartridge for the grad cap and tassle
Cuttlebug folder "Divine Swirls"
5x7 size card

xoxo <3 My favorite part of this card was how 
the silver paper turned out after I ran it through the Cuttlebug :-)

Scrap and work where you can ;-)

 My home is my favorite place in the world to be...however, it isn't the largest of spaces.  With a husband, a daughter, a baby on the way and with working at home; that pretty much takes up the three bedrooms we have (master bedroom, kids bedroom and office)  So, where is one to find some space for the one other thing that she is passionate about (CRAFTING/SCRAP-BOOKING)  In the upstairs hallway "nook" and in the corner on the side of my bed...I received a hand-me down "dresser and that is now my "Cards by Sarah"  space squeezed in a corner.  I love my home, my family and crafts!!  <3  Now if I can just keep all the spaces organized things will be perfect ;-) xoxo


Wednesday, July 25, 2012

Are you ready for some football?

I'm not a Raiders fan...but I was asked to make a card...
I had fun making the footballs with the Tiny Bubbles Cuttlebug folder.
The shapes all came from Everyday Paper Dolls (my favorite cartridge!)
Except the banner, that was from Birthday Bash.  I got the green 
ribbon at Stamper's Corner scrapbook store in my hometown.

I hope the person I made it for likes it too!! <3

Saturday, July 21, 2012

Happy Birthday Madam President


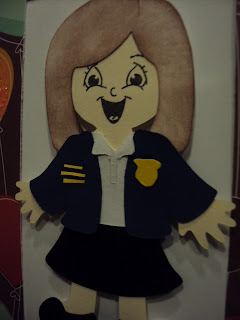
My latest card went to my little sissy who is now 19.  She was elected CA state's FFA President this year...so I made her card to represent that...actually the card was requisitioned by my grandma and she was the one who gave it to her :-)  I thought Everyday Paper Dolls did an excellent job of helping me find the perfect FFA outfit...of course I had to cut out the emblem by hand...but that was no problem!  :-)

Saturday, June 30, 2012

Adventures of a 2 year old

Abigail is almost 2 1/2 now.  She loves playing and climbing...so her Nana and Papa (my husband's parents) bought her a jungle gym/playhouse for their backyard.  She has so much fun climbing up the rock wall and playing in the house!  But her house needed curtains...so Mimi (my mom) got out the sewing machine and quickly made two 2' x 1/2' panels and hung them on a tension rod for her.  Now she has an "awesome" house, as she says, and a safe place to climb!!  <3

Thursday, June 28, 2012

Love You a Latte

I just love this card that I made using my Cricut.
I used my Just Because Cards and Once Upon  A
Princess cartridges.  JBC for the saying and OUAP for the
coffee cup.  The paper and embellishments are from Joanns.
I love you a Latte!!  <3 Sarahendipity 

SCRAP-BO

A bunch of friends and I have taken the "bunko" idea and decided we need a Scrap-bo Night!  Actually it will be a day (10am-4pm)...but we don't need to get technical ;-).  I took it upon myself to be in charge of the game boards and prize baggies for the day.  I think they turned out cute for how quickly I put them together. 

Luckily I've been a good girl and saved my wrappers from when
I buy scrappy things...so I'm reusing a bunch of them for this project.  :-)

The base tags are a piece of cardstock cut at 6" x  4" and then folded in half.
The white cardstock is cut at 5" x 1 1/2".
Then I just ran a strip of adhesive along the inside of the folded base cardstock before
attaching it to the baggies...The baggies open at the bottom, so I don't need to worry about filling them first before putting the tags on.  :-)

I decided to make a "stickle" embellishment.  I used my Simply Charmed
cartridge and cut out the glue bottle.  I modified it a bit and am only cutting
out a few of the pieces so it looks just right.

It's not the straightest...but, the "scrapbo" title was cut from  the Jubilee cartridge
and I used the shadow button at 1 1/2" ...I added stickles to my
embellishment and now the prize baggies are ready to be stuffed. :-)
I hope our Scrap-bo Day goes well and that we all get a lot of scrapbooking done...we better, my Scrap-bo cards should keep everyone busy enough!  Happy Scrapp

Sunday, June 24, 2012

Organized and loving it!!

I feel so much better!!  I went from a messy nook to a clean and organized nook in a matter of a day and now I feel like I can get some things done!!  Watch out hubby, I'm going to be spending a lot more time on the Cricut and in my scrap drawer!  <3 it!

Monday, June 18, 2012

Birthday Card

For this fast card I used a sheet of Doodlebug popouts.  I love how simple it was to throw together.  I hope the birthday teenager I made it for loves it as well!  :-)

Sunday, June 17, 2012

Father's Day

Happy Father's Day to all the wonderful dads out there.
This is the card I created for my husband's dad.  

My daughter is learning quickly that she can be just as creative 
as Momma and she made a card for her Dada too.  

Christmas in June


Here are a few cards that I am mass producing for the holiday season.  They all say "Merry Christmas" inside.  I love how they all turned out.  I used my new Copic markers to color in the stamps... I love those markers!!

Thursday, May 3, 2012

Lately...

 I am pleased to say that I have been very crafty lately...and my craft of choice has been card making.  I am also happy that they aren't all for myself to use.  My family and friends have taken a liking to my work and have been requesting some great creations.   

I like to stay crafty busy, so when my grandfather sent me a list of all the birthday cards he would need for the rest of the year I was excited for the challenge.  I am pleased to say they are finished now.   Unfortunately I forgot to take some pictures of my favorites.  I didn't use the Cricut for all of them and there were a few that I really liked...for example a garden scene made with buttons and ribbon.  Hopefully I'll be able to snag a pic or two when the birthday parties come along and I see the cards again ;-)


My grandma's birthday is today and my mom requested a basket or wheelbarrow or wagon full of flowers for her card.  I chose to put the flowers in a basket and I think it turned out great.  The "basket of flowers card", as I'm calling it now, quickly became a favorite of mine.  I think I especially like it because I love using brads.  I now have at least half a dozen of this card on hand just in case. 


Another event that I have needed a card for was my friend's baby shower.  She just had her baby girl (the shower was a few weeks ago and baby came early) and I made a fun card using my Cricut and the Baby Steps cartridge.  I loved it even more when I added buttons for the wheels.  :-)  I love to add the little touches to my creations.  


Saturday, January 7, 2012

Faith...Trust...and Pixie Dust


In less than a month my baby turns 2!  I can't believe how fast the time has gone.  These are the invites to her birthday...My living room will be transformed into Pixie Hollow and Abby and her friends are going to have a Fairy Tea Party.  I'm so jealous of how awesome her party is going to be, I wish it was my birthday party!  Anyhow, I'm in the process of making the banners and decorations that I need to make everything perfect. :-)